
Disclosure: I am a Mixpanel partner and may earn a commission if you sign up through the links in this post. I use Mixpanel myself and only recommend tools I genuinely use.
Analytics has traditionally been a "tab-switching" exercise. You have a question, you open a browser, you navigate a UI, you build a report, and then you get back to coding. Some switch to a different IDE, writing complex queries, sending, fixing, until they finally have the data.
Mixpanel's new Model Context Protocol (MCP) server collapses this workflow. It brings your product data directly into your CLI, allowing Claude Code to query your live events as easily as it reads your local files.
Here's how to set it up in under 10 minutes, and why it's a game-changer for product engineering.
The 10-Minute Setup Guide
Step 1: Enable MCP in Mixpanel Settings
Before the CLI can talk to your data, an organization admin must authorize the connection.
- Navigate to: Settings → Org Settings → Overview.
- Action: Toggle Enable MCP.

Step 2: Add the MCP Server to Claude Code
Open your terminal and register the server. We use mcp-remote as a proxy to Mixpanel's hosted endpoint.
claude mcp add mixpanel -- npx -y mcp-remote https://mcp.mixpanel.com/mcp
Easier - just paste this prompt directly into Claude:
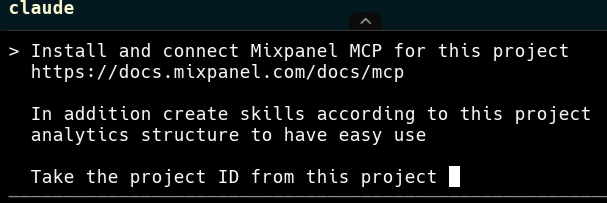
Install and connect Mixpanel MCP for this project
https://docs.mixpanel.com/docs/mcp

In addition create skills according to this project
analytics structure to have easy use

Take the project ID from this project
Claude will handle the configuration, pull the project ID from context, and even create custom analytics skills tailored to your event structure.
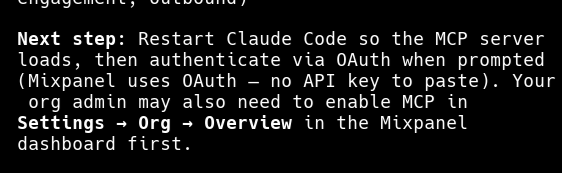
Step 3: Authenticate via OAuth
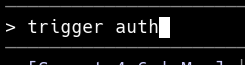
Claude will tell you when it's time. You can ask it to trigger the auth step, and it will open the browser for you.
While Step 2 told Claude where the server is, you still need to log in. Run this command in a separate, standard terminal window (why? because running it inside Claude Code's interactive session will block the browser redirect needed for OAuth):
npx -y mcp-remote https://mcp.mixpanel.com/mcp
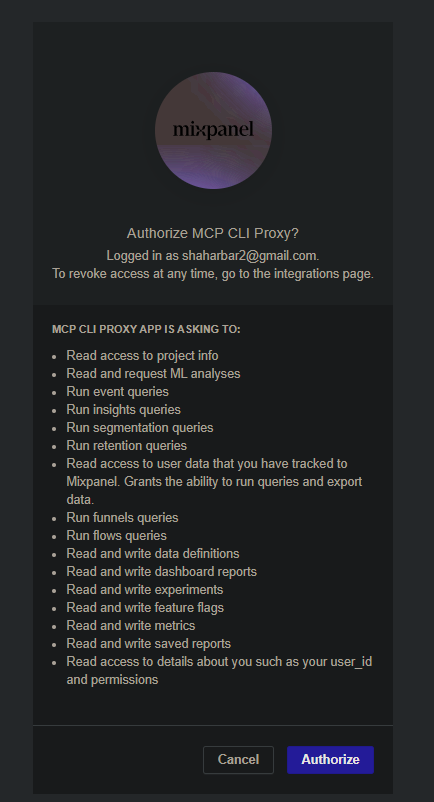
- A browser window will open automatically.
- Log in with your Mixpanel credentials.
- Review the permissions and click Authorize.
- Once you see "Authorization successful!", return to the CLI.
Your token is securely cached in your home directory (~/.mcp-auth/ on macOS/Linux, or %USERPROFILE%\.mcp-auth\ on Windows), so you won't need to repeat this until the token expires.
Step 4: Restart & Verify
Restart Claude Code to initialize the new configuration. To confirm everything is running:
claude mcp list
You should see a green checkmark: ✓ mixpanel.
Start Querying - No Dashboard Needed
Because Claude integrates this tool natively, you can skip the manual report building. It handles query formulation, schema lookups, and pivoting automatically.
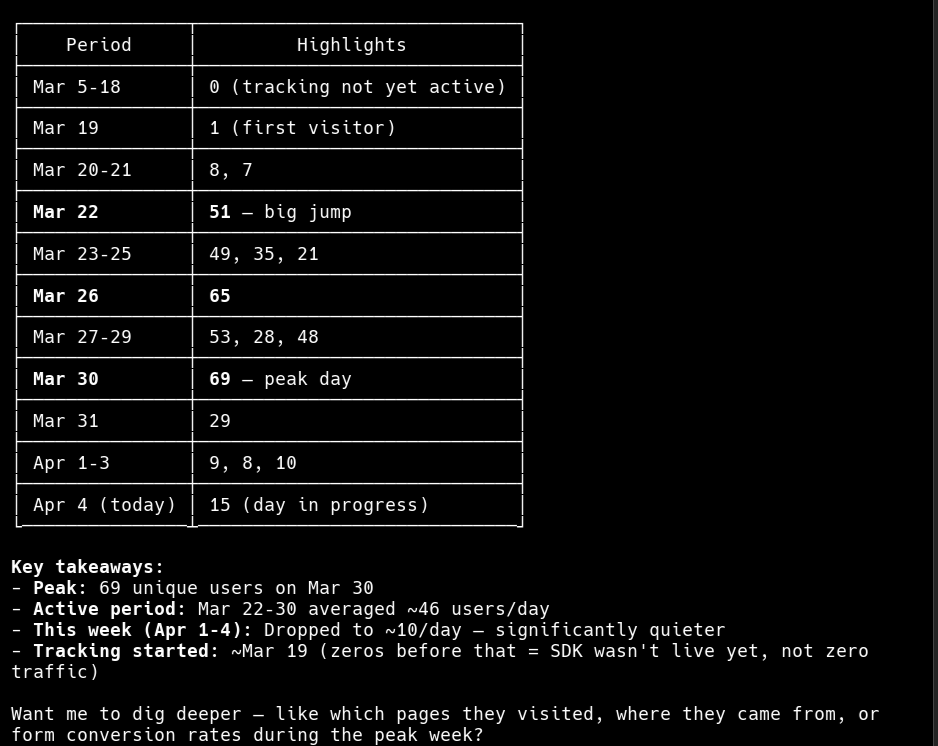
A real example from my terminal:

Claude automatically loads the mixpanel skill to handle it:

One question. Instant answer. No UI required.
The Real Magic: Code + Data + Docs
The real "unlock" here isn't just that Claude can read Mixpanel - it's that Claude reads Mixpanel while sitting inside your codebase. When Claude has access to your Docs (the plan), your Code (the implementation), and Mixpanel (the live results), it closes the feedback loop entirely.
You can ask prompts like:
"Look at the tracking-plan.md in our docs folder, then check Mixpanel to see if we are actually receiving the
plan_typeproperty on thesignup_completedevent."
Claude reads the spec, checks the live Lexicon, and identifies mismatches instantly.
You can even use it for code cleanup and debugging:
"Check our analytics.ts file for all events currently implemented. Then, query Mixpanel to tell me which of these events have had zero volume in the last 7 days."
Claude parses your TypeScript, extracts the event names, maps them against live production data, and flags dead code or broken tracking in seconds. It transforms the AI from a simple coding assistant into a product engineer that understands the real-world impact of the lines it's writing.
Troubleshooting
If claude mcp list shows ✗ Failed to connect, it almost always means the OAuth flow didn't finish correctly.
- Check: Look in your
~/.mcp-auth/directory (or%USERPROFILE%\.mcp-auth\on Windows) for a token file. - Fix: If it's missing (and you only see
_client_info.json), re-run thenpx mcp-remotecommand in a standard terminal window to trigger the browser login again.
Final Thoughts
The Mixpanel MCP exposes event details, property values, retention, funnels, flows, and session replay metadata. It takes 10 minutes to set up, but the ability to query production data directly from your terminal changes how you build.
Set it up, ask "Which events had zero volume this week?" and you'll never open that dashboard tab again.
Want to Talk Mixpanel?
I'm a Mixpanel partner and I help teams set up analytics the right way - tracking plans, event design, MCP integration, and getting real value out of your data.
If you're setting this up and want a second pair of eyes, or just want to chat about how to get the most out of Mixpanel for your product - message me directly:
Chat on WhatsApp